Prove you own a source
Show that you control a source's address. Transica asks only when a step needs it: explores and AI browser tests on a website, hosting and AI connector tests on an API, tests on an MCP server.
You need: access to the source's files or your domain's DNS. Who: members and admins.
Your domain, once
The domain record you add for an own-domain address on Hosting (_transica-domain.example.com) proves every source on that domain and its subdomains: example.com, api.example.com and mcp.example.com alike. Sources it covers show DNS under Verified on Sources. A website's own verification record proves that website only.
API or MCP server: a file under its path
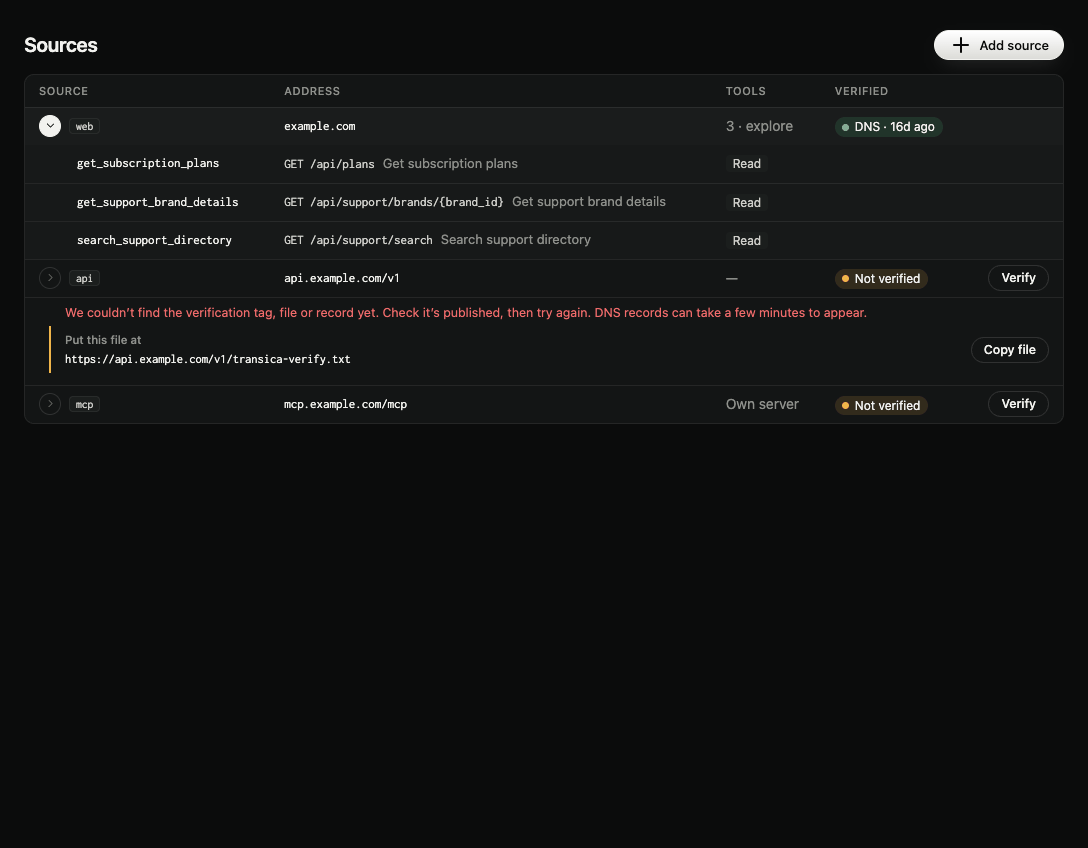
- On Sources, select Verify on the source's row.
- Under Put this file at is the address, for example
api.example.com/v1/transica-verify.txt. Select Copy file and serve it at that address, publicly, without sign-in or redirects. - Select Verify again.
Website
Pick one method in guided setup at Verify ownership. All three use the same code, shown on the page.
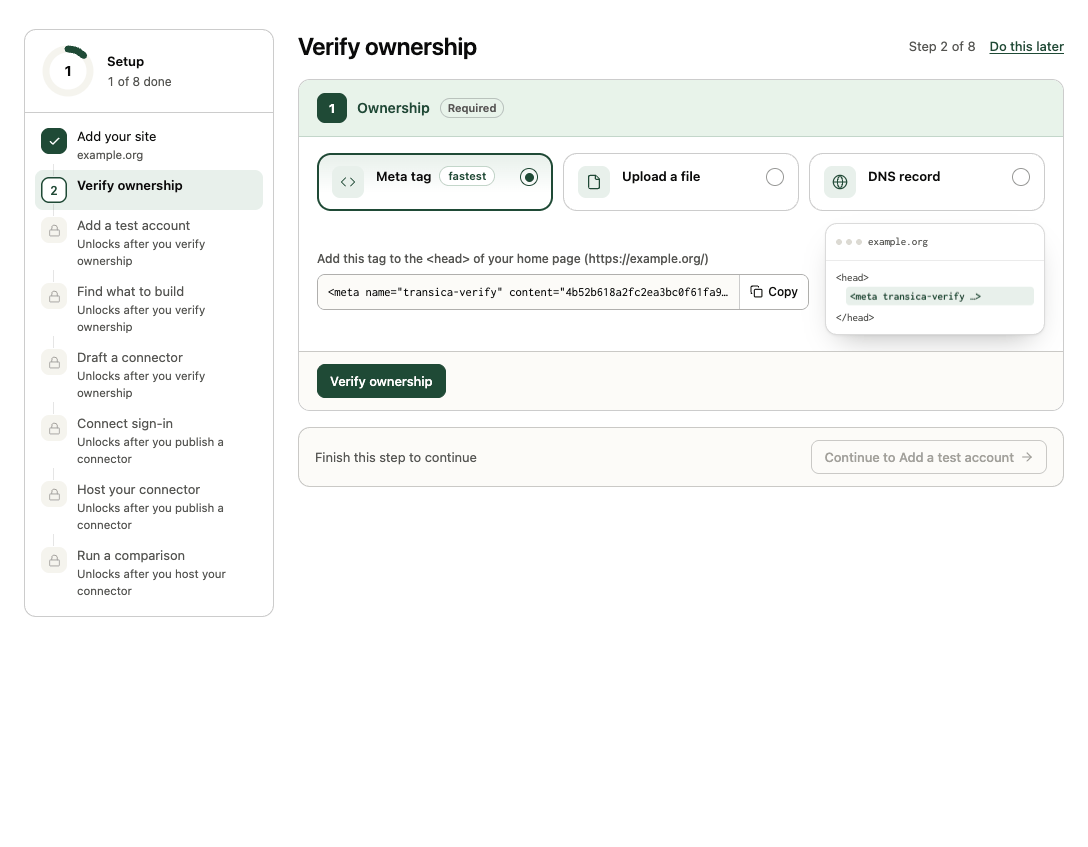
- Copy the tag, for example
<meta name="transica-verify" content="15ebd5…">. - Add it to the
<head>of your home page and publish. - Select Verify ownership.
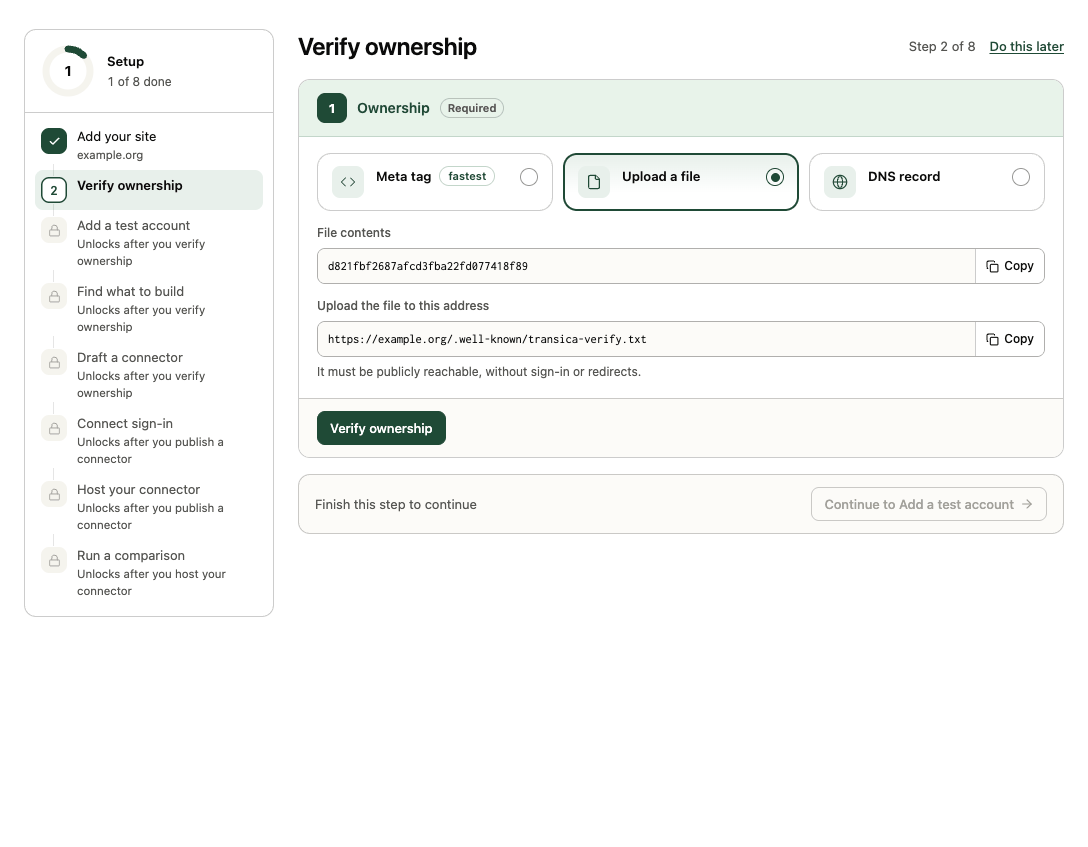
- Create a file containing just the code.
- Upload it so it's served at
https://yoursite.com/.well-known/transica-verify.txt, publicly, without sign-in or redirects. - Select Verify ownership.
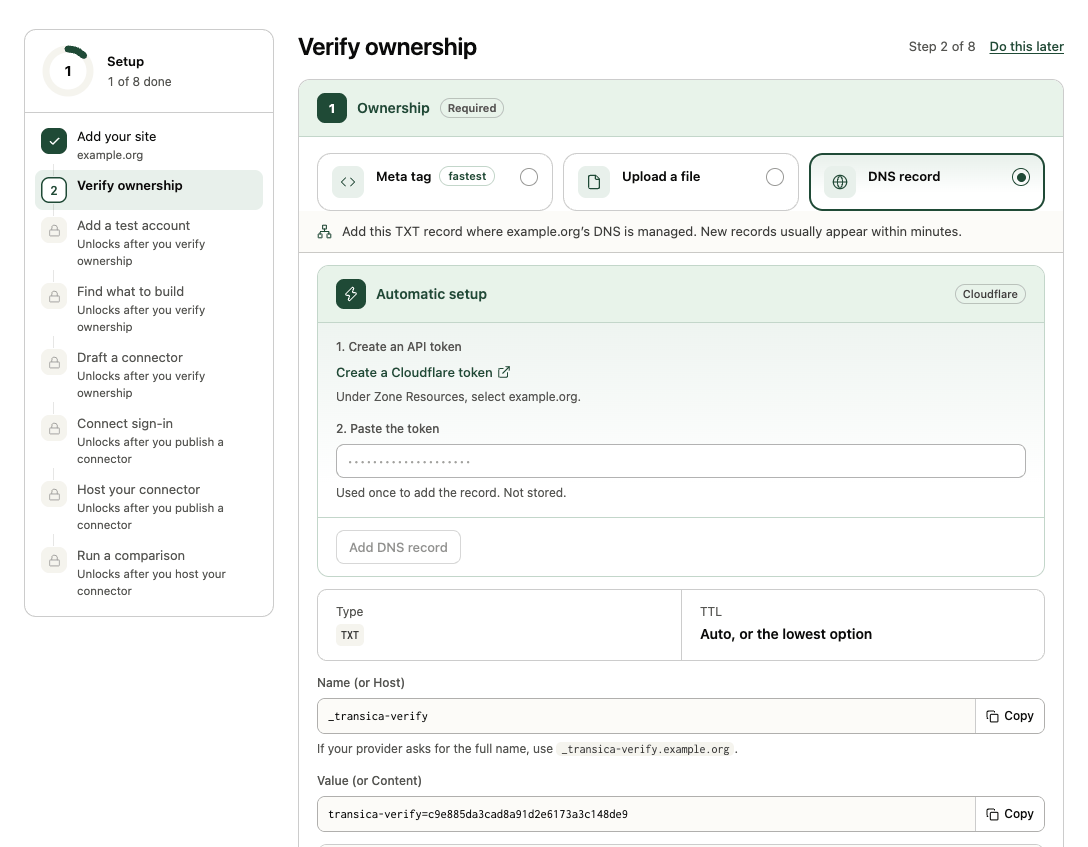
Add a TXT record where your domain's DNS is managed:
| Type | Name (or Host) | Value (or Content) | TTL |
|---|---|---|---|
| TXT | _transica-verify |
transica-verify=<your code> |
Auto, or the lowest option |
If your provider asks for the full name, use _transica-verify.yoursite.com. Where to find DNS settings has the steps for Cloudflare, GoDaddy and Namecheap. New records usually appear within minutes; then select Verify ownership.
Add it automatically (admins): Transica looks up where your DNS is managed.
- If your provider supports one-click setup, select Sign in to your provider and approve the one record. You come straight back and the record is checked for you. Nothing else in your DNS changes.
- On Cloudflare, under Automatic setup: Create a Cloudflare token (DNS edit rights for your zone), paste it and select Add DNS record. The token is used once and not stored.
When the check passes, the Ownership card shows what was found (for example DNS record found), and the rest of setup unlocks.
Keep it in place
Proof is re-checked before every test. Leave the tag, file or record in place; if it disappears, tests stop with a message until you verify again from Sources or Site settings → Ownership.
Troubleshooting
- Tag not found: make sure it's in the served HTML of the exact home page shown (view source, not the browser's inspector), and that a cache or CDN isn't serving an old copy.
- File not found: the address must answer
200directly, with no redirect to another page or a sign-in. - DNS not found yet: DNS can take a while to spread. Check the record name doesn't end up doubled (
_transica-verify.yoursite.com.yoursite.com).
Next: Add a test account, Explore your site or Host your connector.